Do you know garlic doesn’t require much watering to thrive? Your full guide to growing your first garlic crop – From Seed To Harvest: A Guide To Growing Garlic Easily – is here! Garlics are famous for their pungent yet attractive smell, which makes them perfect flavoring vegetables or condiments in thousands of dishes. So why don’t you grow your garlic crops in autumn and enjoy them when it’s early Summer?
Don’t miss my instructions and caring tips to harvest the best garlic crops right from your first attempt!
Overview
Level of difficulty: Easy
Nutrition: Alongside being a delicious flavoring ingredient (I’m a big fan of garlic confit), this raw material is rich in Vitamin C, B6, selenium, and protein.
Eating garlic has numerous health benefits, but the most major and commonly known one is its anti-cancer characteristic. Containing antioxidants and quercetin, garlic reduces the risk of propagating cancer cells and promotes new blood vessels to grow.
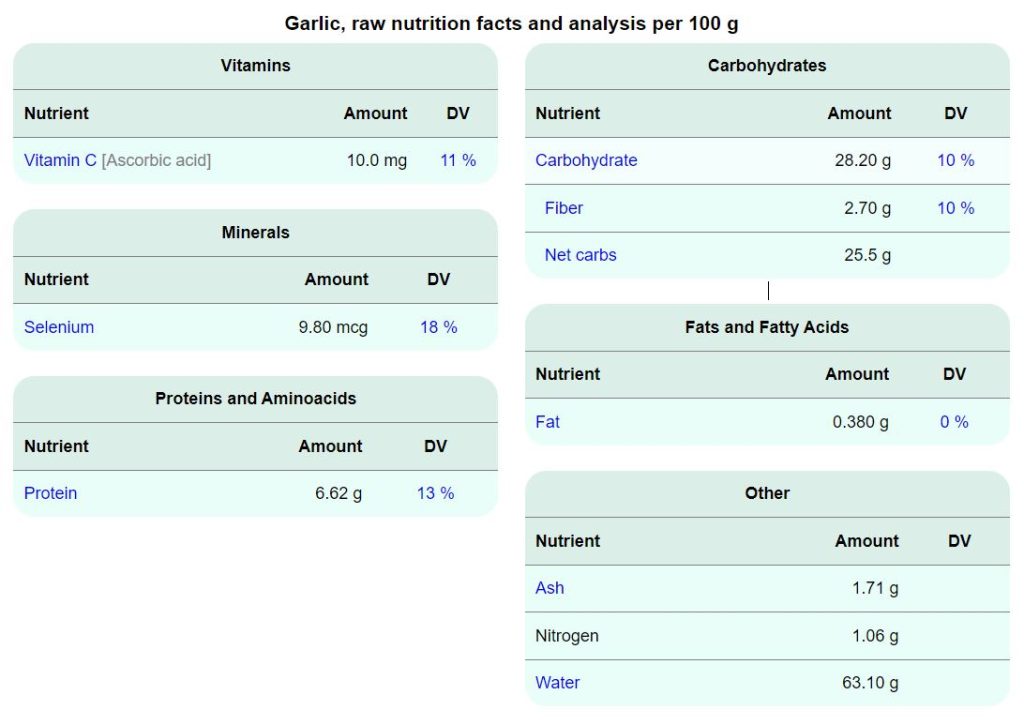
Nutrients in garlic
Lifespan: How long does garlic take to grow and how long does it last? After about 7 to 8 months post-germination, garlic bulbs develop to their fullest potential, and gardeners can start harvesting and preparing for storage.
Some say that a whole garlic head can sit outside for 6 months if the environment is dry and cool. But the general shelf time usually is 3 weeks to a month. With that said, it´s a rule of thumb to consume your unpeeled garlic as soon as possible. The same goes for any vegetable or even spices to avoid mold formation or fungi invasion.
Tips For Choosing Garlic Cultivars
There are so many garlic cultivars to choose from, each with different flavor notes and intensity. You can purchase fresh garlic from supermarkets or, better, local farmers for an easy cultivar selection with proper quality. Don’t attempt planting garlic seeds because germinating them takes a lot more work. We are going to produce from cloves!
- Italian Red (Soft neck): Sweet flavor and a moderate kick of heat
- Glen Large (Soft neck): Sweet flavor and a moderate heat
- Kettle River Giant (Soft neck): Large bulb, strong garlic taste with spicy flavor
- Early Purple (Hard neck): Large bulb, large cloves, mild flavor
- Garlic Spanish Benitee (Hard neck): Sweet and mild flavor, can be consumed raw without tasting too strong (for garlic lovers, of course)
- Elephant garlic (Hard neck): Not a real garlic hybrid but actually a leek. This has a mild flavor.
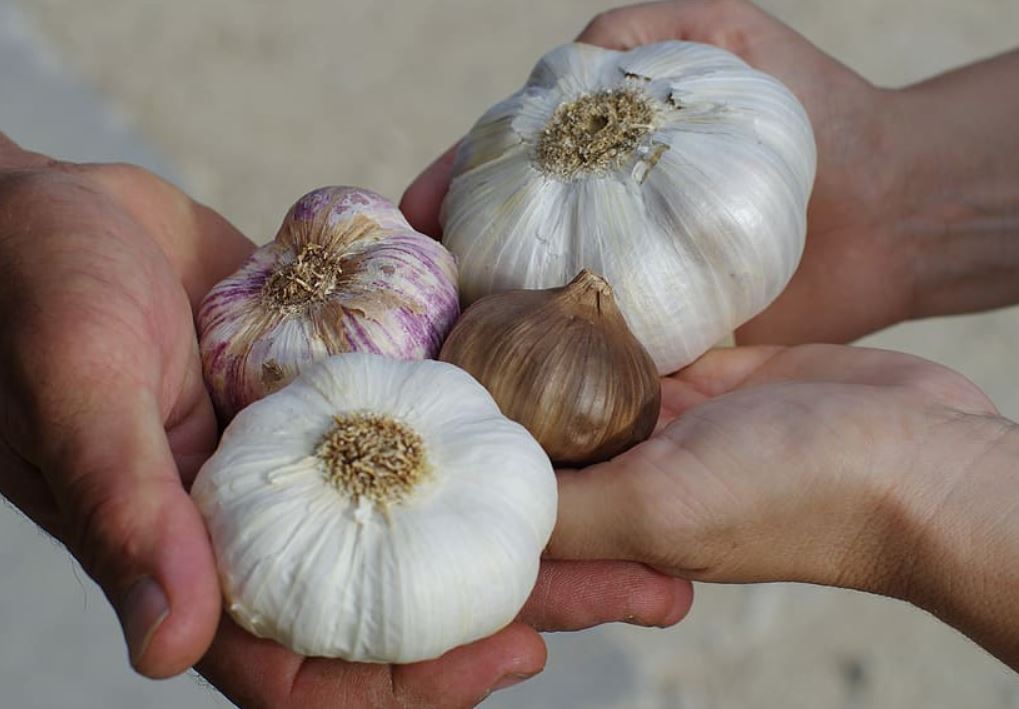
There are many types of garlic to choose from
In case you don’t care much about flavor, it’s worth considering how easy it is to peel each type. Typically, garlic with larger cloves and hard-neck tends to have drier and less sticky clove skin, making peeling effortless.
Preparation
You don’t have to prepare much to grow garlic. Learn all the things you need here!
Tools
- Plastic cups with mouths smaller than the garlic bulbs you choose (if you want to germinate the cloves in water instead of soil)
- Distilled water and tap water
- Loamy and sandy soil
- Compost
- Nitrogen-rich fertilizer
- Potassium-rich fertilizer
Containers
Large garden beds to grow rows of garlic or big cell flats with drainage holes to grow individual garlic. You can choose cell flat to avoid root bound between bulbs planted too close to each other.
From Seed ToHarvest: A Guide To Growing GarlicSuccessfully With Great Yield!
Basically, all you need to learn is how to plant a clove of garlic! Learn the way from A-Z here.
Germination
There are 2 ways to germinate garlic cloves in water or soil. I will explain the benefits of each method and how to carry them out!
Germinate garlic bulbs in water: This method is easy and takes 5-6 days from imbibition to transplanting, and you can start seeing sprouts growing after only 2 days. So, the only inconvenience is separating the cloves from each other and repotting them.
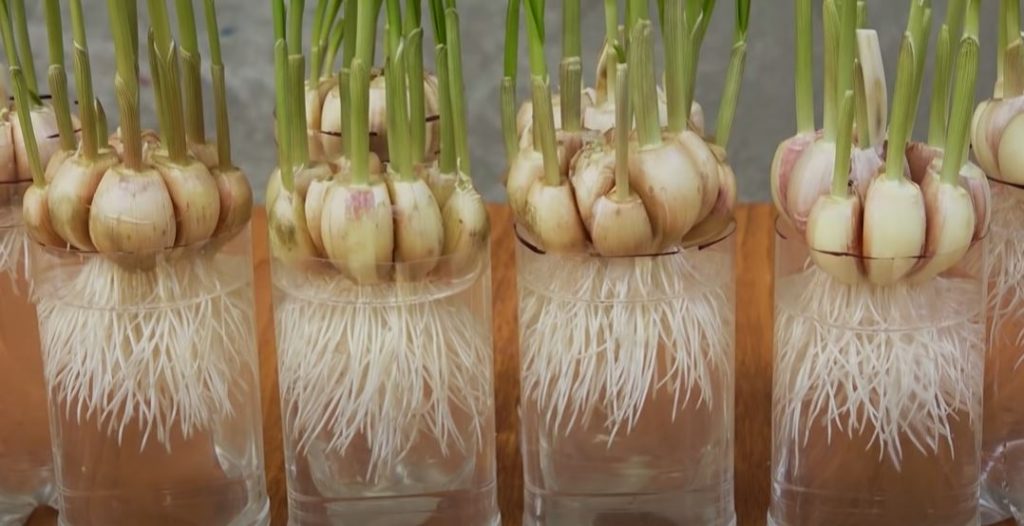
There are many types of garlic to choose from
- Step 1: Fill the plastic cups or your containers of choice with water to the top.
- Step 2: Remove the outer peels of your full-size garlic bulbs.
- Step 3: Submerge the base plate with the roots of the garlic bulb into the water while the stalk points upward.
- Step 4: Place the cups with the bulbs where they can receive at least 6-7 hours of sun daily. Check the water level frequently to make sure that the root system is submerged in water. Refill if necessary.
- Step 5: After about 6 days, you should have the sprout leaves escaping each clove. Remove the entire bulbs from the water and carefully separate the cloves without breaking the roots.
Germinate garlic cloves directly in soil: This method is convenient since you don’t have to undergo another transplantation. But the downside is that the cloves may rot if you overwater or plant them too deep.
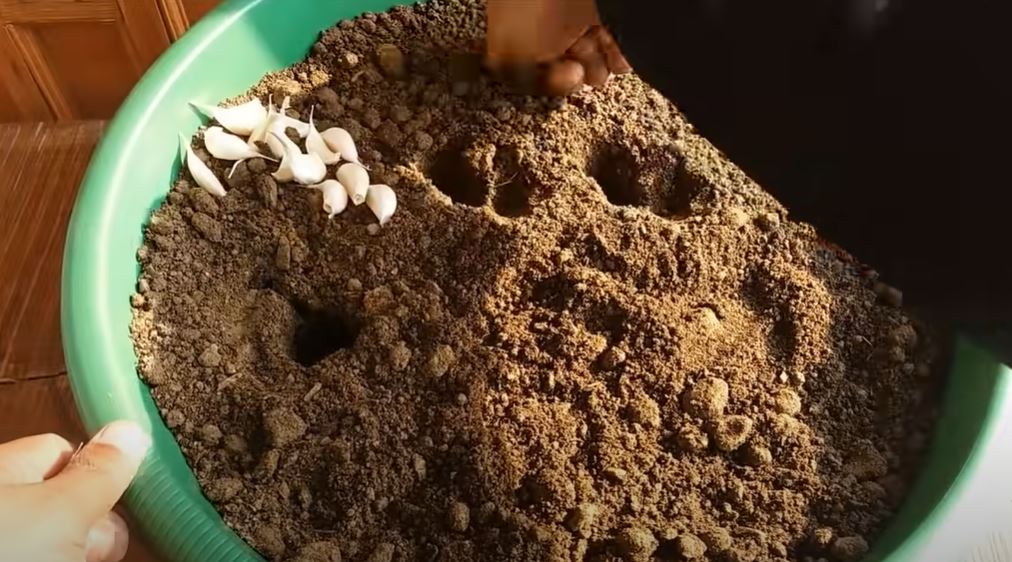
Germinating garlic cloves in soil avoids roots’ damage
- Step 1: Take your garlic bulb and separate the cloves, don’t touch the peel or the fragments of the basal plate where the roots grow from. You can throw away small cloves since they produce small garlic.
- Step 2: Mix your soil blend with 3 parts loamy soil, 3 parts sandy soil, 1 part compost. Or, you can use loamy soil and compost only. Make sure that the soil stays where the sun reaches.
- Step 3: Use your finger to make holes where you can fit the cloves
- Step 4: Plant each clove under the soil with the root down and the pointy end up. This is very important because you don’t want the roots to grow sideways or have abnormal water imbibition. Remember not to sow too deep under the ground, either. Keep the cloves under the soil surface, about 1.5 inches below.
- Step 5: Water the soil abundantly to ensure humidity reaches the basal plate of each clove. The water may take some time to sip down. Observe to avoid overwatering as well.
- Step 6: Water whenever you dip the first inch of your finger in the soil and feel dry or slightly wet only. Like germinating in water, you will see large sprouts after 5 days.
Seedling
If you choose germinating garlic bulbs in water, it’s time to classify your cultivars. Choose the big cloves with the seedlings to plant or grow since they are viable and tend to produce bigger bulbs. If you don’t mind smaller garlic, you can also keep the mini cloves.
As for the method of germinating in soil, we already classify the “seeds” at the beginning, so all the seedlings we have now are good breeds.
Keep on watering every week with a moderate 1-inch of water. Garlic doesn’t love water that much, so a regular supply isn’t necessary. And fertilizer isn’t needed yet at this stage, not until the bulbs are about to thrive.
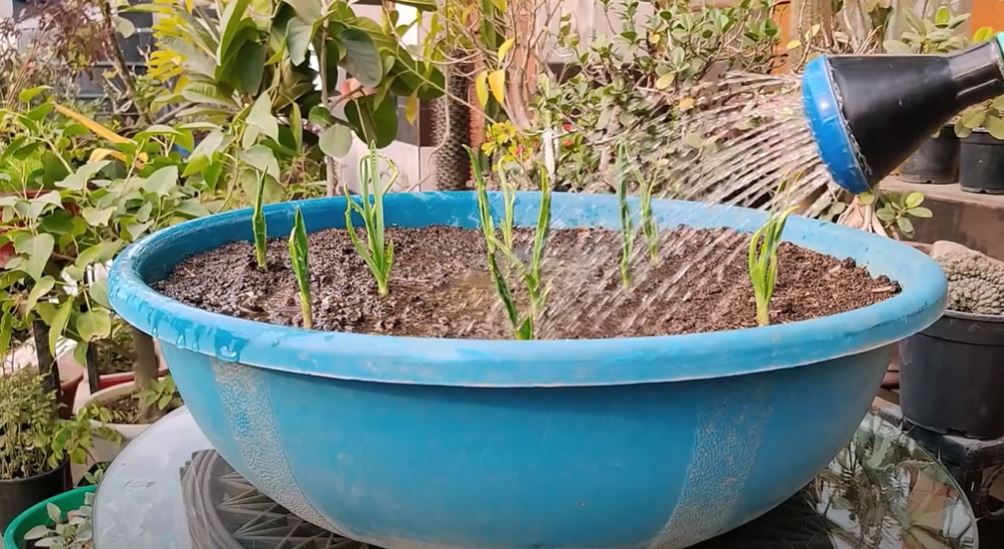
Water garlic seedlings moderately every week
Adult plant
I deem this is the right time for fertilizer. If you sow the garlic cloves in autumn (September – October), you should start fertilizing the clusters in early spring (beginning of March). This is the time all the nutrients go into making the bulbs expand. You can use blood meals, well-rotted manures, or Nitrogen-high composts to feed your garlic.
If you distribute fertilizer on top of the soil instead of positioning it between rows (3 inches apart), water the ground so that the fertilizer diffuses and dilutes.
Fertilize again in mid or late April with a fertilizer high in potassium (K) for the bulbs to expand faster.
Harvest
After 8-9 months, it’s time to harvest your big bulbs of garlic!
- If the top leaves have dried out and the soil is dry, it is time. Use a small trowel to loosen the soil around the bulb and pull them up.
- Hang them up to dry indoors where there is ventilation to avoid bugs taking advantage of the freshly harvested garlic bulbs.
- Wait about 2 weeks and remove the thin and dirty outer layer of the peel. Don’t remove the middle layer yet! You can store the garlic in a dark and cool place and use it for 5-6 months!
How To Care For Garlics
Garlic is quite a winter hardy, and it even needs a short period of cold air from 30 to 50oF to develop its pungent cloves. But, with that said, this type of spice isn´t always hardy and may require lots of care during rainy seasons. Check out how you should take care of your garlic crops here!
Light
Yes, garlic needs direct sun from 6 to 10 hours daily to thrive and stimulate bulbs’ growth. That’s why I genuinely recommend growing garlic outdoors. Of course, it’s okay to plant them in pots, but make sure that you take them out for daily sunbathing if you want fully-grown garlic bulbs with authentic flavor notes.
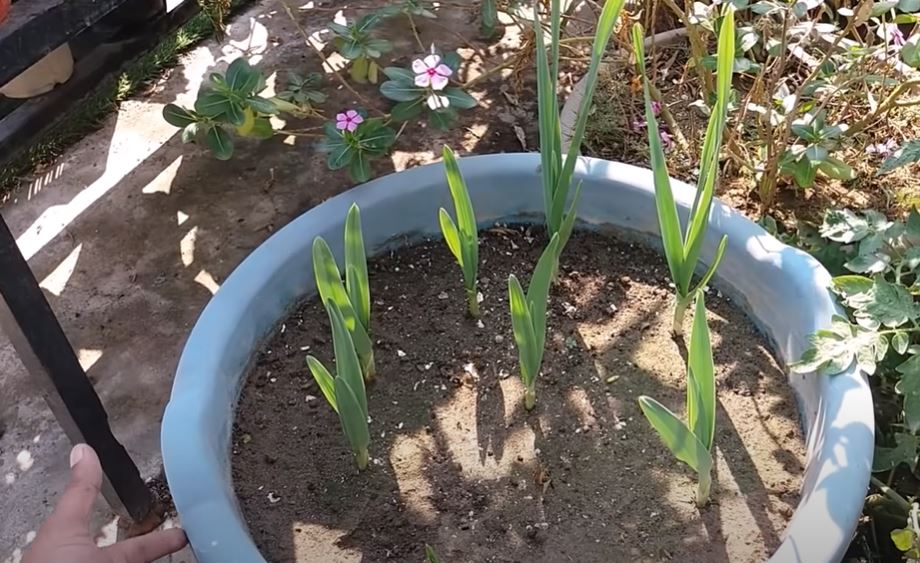
Garlic needs at least 6 hours of direct sun per day
Temperature
As I mentioned, garlic is winter-hardy and can handle cold fronts very well. That´s why they tend to thrive the best at 50 – 65oF. On cold months, they can withstand 20oF or even lower for up to 10 weeks, but it´s not recommendable to leave the bulbs out in the cold as low as 10-15oF, even when the cultivars can tolerate it since it may cause underwhelmed bulbs growth in the long run.
With this information, it’s logical to start germinating garlic in early or mid-autumn when the temperature has cooled off a bit (September – October). The garlic will have 8-9 months to grow throughout fall and winter with colder temperatures, providing the cold boost this species loves.
Water and soil
Garlic isn’t water-thirsty species and thus doesn’t require constant watering, especially in hotter climates. Typically, you only need to water your garlic seedlings and bulbs once weekly with about 1-1.5 inches of water each time, depending on the soil where you grow your crops.
Do we need a seed starting mix to germinate garlic successfully? No, since we aren’t germinating garlic’ seeds but cloves. The cloves can handle garden or potting soil, as long as there isn’t any disease or fungi.
The best soil type to accompany garlic’s spread-out watering schedule is sandy and loamy since they are well-drained and can avoid rot or overwatering. But sandy soil is typically more well-drained than loamy soil, so it’s fair to water your garlic more (1.5 inches), while loamy soil only requires 1 inch of water weekly.
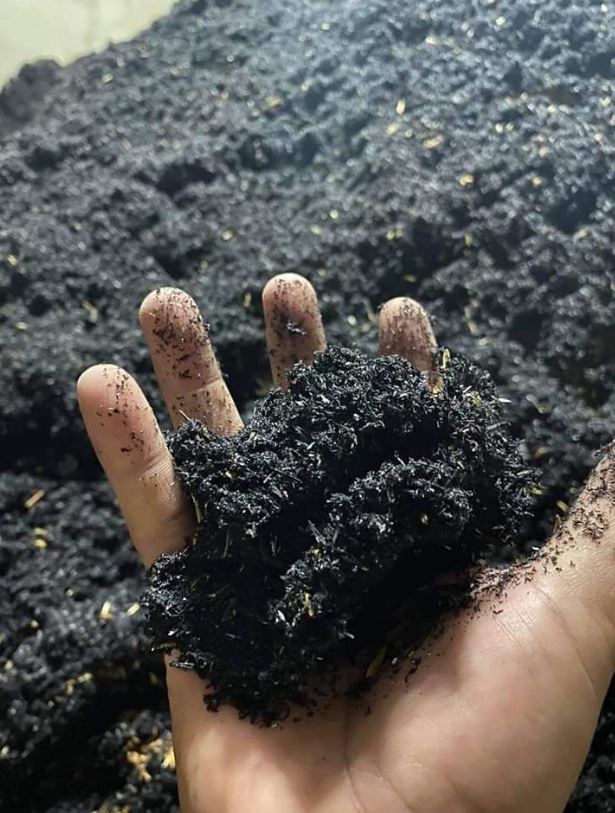
Loamy and sandy soil is preferred for garlic growing
Can garlic grow in clay or silt soil? Yes, but it’s not recommendable because the humidity is too high unless you control the watering carefully. I advise you to purchase and use sandy or loamy soil or a mixture of both with some compost.
Oxygen
Garlic cloves don’t need too much oxygen in their diet, but that doesn’t mean we can overwater and block their airway. Well-drained soil and moderate watering will provide sufficient oxygen for the cloves’ roots. When germinating the garlic cloves, I don’t bury them too deep in the ground, either. It’s essential to ensure the cloves are only lightly covered in dirt.
Diseases/ bugs
Some common diseases and bugs that enjoy attacking garlic crops are:
- Basal rot
- Rust
- White rot
- Green rot
- Downy Mildew
- Dry rot
- Nematode bug
- Onion maggots
- Thrips
The best way to keep your garlic cluster healthy and free of harm is using fungicide as a preventative method. Spray your garlic after 1 month of growing or even sooner if you have seen signs of bugs circling the leaves. Reapply every 1 to 2 weeks to keep up with the preventative purpose.
Tebuconazole, Propiconazole, and Captan are 3 most effective fungicides tested on garlic crops. Make sure you dilute the solutions depending on the instructions provided in the bottles.
Fertilizer
If the crops start in autumn, you can add fertilizers to the soil in spring. It doesn’t have to be commercial fertilizers. Any compost high in Nitrogen is recommendable. Well-rotted manure, vegetable scraps, and grass clippings are all composts with a high Nitrogen component.
Try all these tips and tricks and you should be able to enjoy your first garlic batch soon!
